Wednesday, July 24, 2013

Having a Fairy Princess Day

Fairy  Princess Ayanna
Tree Fairy Ayanna

Fairy Ayanna running from the Croc Javier


Fairy Princess Brenna flying from Croc Javier

Fairy princess meeting in the meadow
Fairy Princess Brenna Running from another Croc Jett

Fairy princess Lily with a broken wing

Monday, July 22, 2013

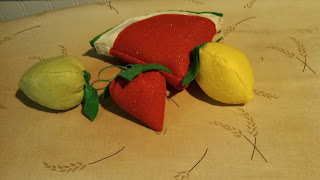
Felt Fruit Fun Tutorial

My grand-kids love to play with these
felt fruit and veggies.
It is a great beginner sewing project.
You can have results in less than an hour.
 

This is the pattern for a Strawberry.
You will need a piece of red felt
and a piece of green felt. Usually the squares are 25 to 40 cents each at the store. You can get two Strawberries out of one square of felt.


Fold the red felt in half and sew
the straight edges together.
You can do this by hand
or on the machine.
I fill the berry with batting first. Then I added some dry rice for some weight. I make a hole in the batting with my finger and then add the rice. Wiggle the rice into the batting. Fill until it is full. 


I start sewing the middle of the strawberry top. Stitch with a double thread, it makes it stronger for all the pulling.


Keep going around the top until it is all sewn down. Now it is time for the green. Using Green double thread, I sew the top to the strawberry in a small circle.  Then pull it tight to give it some form. Then I like to use Embroidery floss to make a loop on the center of the green. It kind of looks like the stem. 


I chose to use red felt with a little sparkle on it. I didn't want to take time to put seeds.
You can if you want to though. Either with a black fabric pen or sew on seed beads. It depends on the age of the children in your house.
I made these to toss in a blender for a fun game.
So less was better.
Thank you for visiting.
Have FUN!!! 

Sunday, July 21, 2013

Simple Aprons made from shirts tutorial

Start with a shirt. Long sleeves or short it doesn't matter because you are going to cut them off. 

Cut up the side seams to the underarm. Cut from the underarm toward the neck. Stop about an inch away and cut around the back of the neck. Make a smooth transition to make it easier to put the bias tape on. 

Notice the inch of fabric left
on the bottom of the collar. 

If you choose to add ruffles here are the instructions. You don't have to and they still look cute.
You want to cut the bottom ruffle out of the shirt back. I cut 2 pieces about 6" wide and the whole with of the shirt. Then cut 2 pieces out of the contrasting fabric about 4" x the same length as the other ruffle pieces. Sew them together in the center to make 2 long strips. Hem one of the long sides of each piece. Then lay the 4" strips on the top of the 6" strips. Hem the ends of the stripes. Match the raw edges and run a gather stitch on the raw edge side.  

Pin the ruffle on and stitch. take a 3 yd piece of bias tape and find the middle. Pin that to the center back and go toward the underarm. start at one end of the tape and sew all the way to the other side. You are finished. Good Job!
Notice the one on the left has no ruffle. Your choice. 

Ashley likes to bring the strings around and tie in the front. 


Two more color combinations.

Brenna in  her apron.

Mommies little helper! Fun Fun Fin!

Celebrate Hillsboro Festival July 20 2013


Meet my Green Smoothie Princesses 
This princess knows how to pose. 
Having fun dressing up! I love her crown!

Fruit and Veggies are being tossed into the blender.
Good job with that Green Smoothie


Tammy at the Booth

Lily helping out!
Cute Hat!

 I am new at this blogging and haven't got it all worked out so please go ahead and capture your kids and edit away. Thanks for your patience this is a first for me.


Good Sports!!!
Cute sisters.


Having fun a the Festival.
A princess with a Green Smoothie apron on.
A Princess that knows how to work. WOW!
                                           
   A knight in shining Armor ...almost. LOL


A ninja Prince. LOL
   Such a beautiful Princess.

                             
I'm the quiet type.